Running our first Jenkins job – Continuous Integration with GitHub Actions and Jenkins
Before we create our first job, we’ll have to prepare our repository to run the job. We will reuse the mdo-posts repository for this. We will copy a build.sh file to the repository, which will build the container image for the posts microservice and push it to Docker Hub.
The build.sh script takes IMAGE_ID and IMAGE_TAG as arguments. It passes them to the Kaniko executor script, which builds the container image using the Dockerfile and pushes it to Docker Hub using the following code:
IMAGE_ID=$1 && \
IMAGE_TAG=$2 && \
export DOCKER_CONFIG=/kaniko/.dockerconfig && \
/kaniko/executor \
–context $(pwd) \
–dockerfile $(pwd)/Dockerfile \
–destination $IMAGE_ID:$IMAGE_TAG \
–force
We will need to copy this file to our local repository using the following commands:
$ cp ~/modern-devops/ch11/jenkins/jenkins-agent/build.sh ~/mdo-posts/
Once you’ve done this, cd into your local repository – that is, ~/mdo-posts – and commit and push your changes to GitHub. Once you’ve done this, you’ll be ready to create a job in Jenkins.
To create a new job in Jenkins, go to the Jenkins home page and select New Item | Freestyle Job.
Provide a job name (preferably the same as the Git repository name), then click Next.
Click on Source Code Management, select Git, and add your Git repository URL, as shown in the following example. Specify the branch from where you want to build:
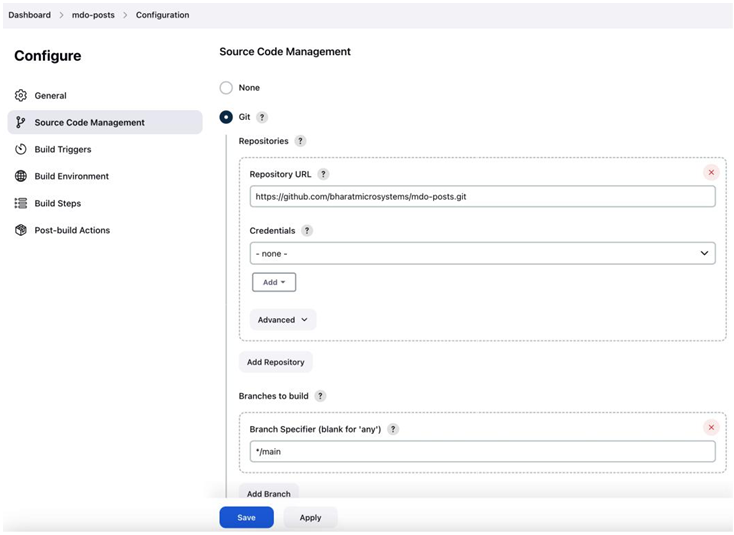
Figure 11.11 – Jenkins Souce Code Management configuration
Go to Build Triggers, select Poll SCM, and add the following details:
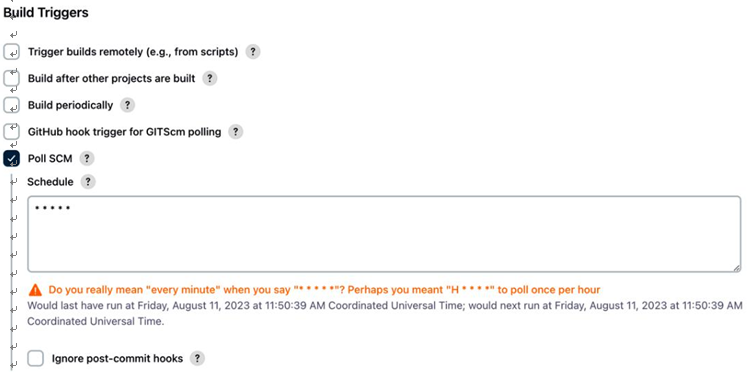
Figure 11.12 – Jenkins – Build Triggers configuration
Then, click on Build | Add Build Step | Execute shell. The Execute shell build step executes a sequence of shell commands on the Linux CLI. In this example, we’re running the build.sh script with the <your_dockerhub_user>/<image> argument and the image tag. Change the details according to your requirements. Once you’ve finished, click Save:
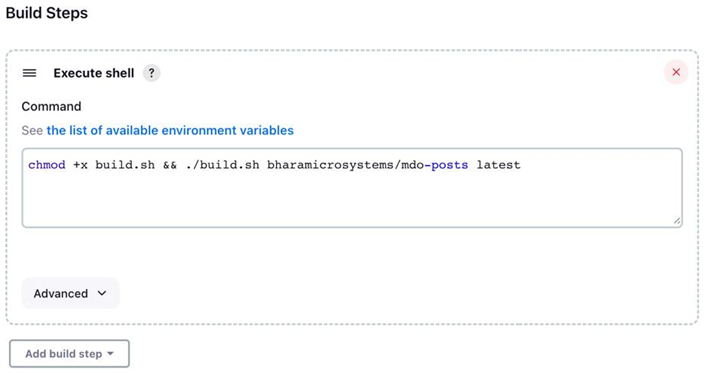
Figure 11.13 – Jenkins – Execute shell configuration
Now, we’re ready to build this job. To do so, you can either go to your job configuration and click Build Now or push a change to GitHub. You should see something like the following:
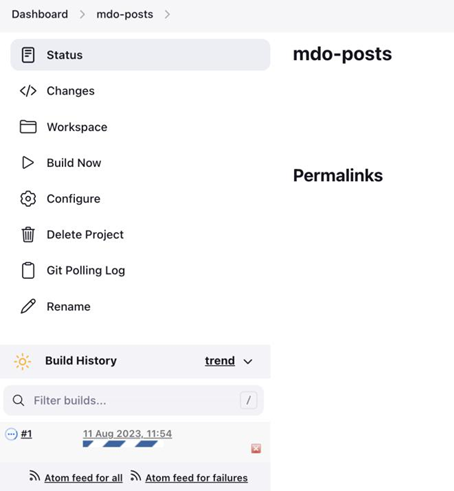
Figure 11.14 – Jenkins job page
Jenkins will successfully create an agent pod in Kubernetes, where it will run this job, and soon, the job will start building. Click Build | Console Output. If everything is OK, you’ll see that the build was successful and that Jenkins has built the posts service and executed a unit test before pushing the Docker image to the registry:
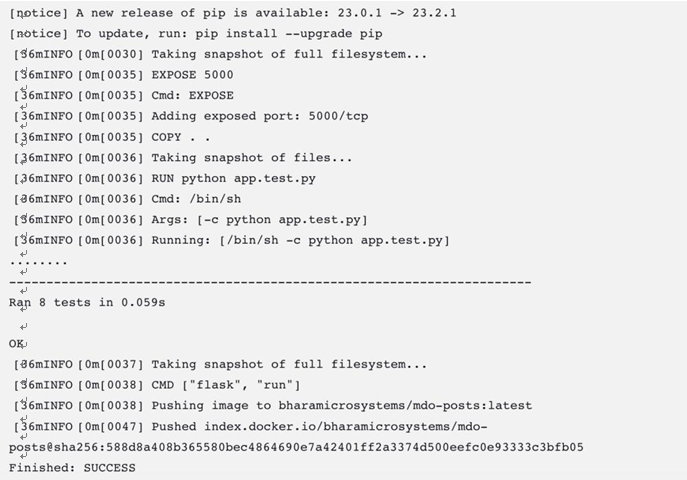
Figure 11.15 – Jenkins console output
With that, we’re able to run a Docker build using a scalable Jenkins server. As we can see, we’ve set up polling on the SCM settings to look for changes every minute and build the job if we detect any. However, this is resource-intensive and does not help in the long run. Just imagine that you have hundreds of jobs interacting with multiple GitHub repositories, and the Jenkins controller is polling them every minute. A better approach would be if GitHub could trigger a post-commit webhook on Jenkins. Here, Jenkins can build the job whenever there are changes in the repository. We’ll look at that scenario in the next section.